Getting Started with CareRadius v4
The new Radius Hub streamlines your workflow into four simple steps. Follow this guide to set up your community group assignments in minutes.
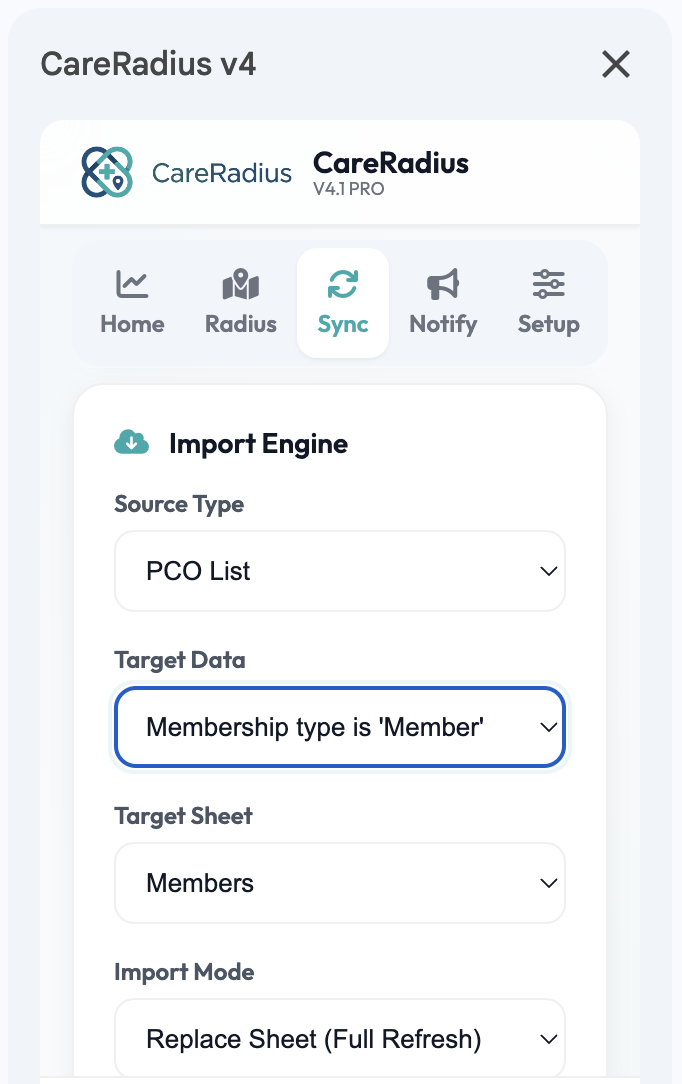
Sync with Planning Center
Open the CareRadius add-on in Google Sheets. Click on the Sync & Import tab to connect to your PCO account. CareRadius will automatically pull in your latest Leaders and Members.
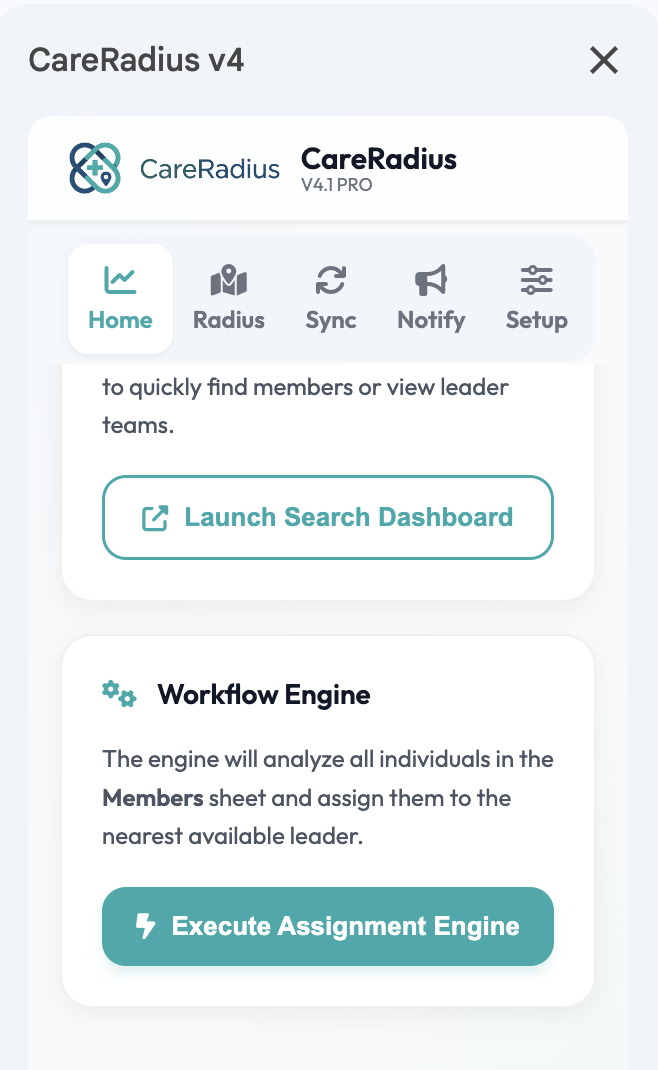
Run Auto-Assignment
Navigate to the Radius Hub. Click Run Auto-Assignment. The engine will instantly calculate the best fit for every member based on drive time, gender targets, campus requirements, and leader capacity.
Review & Finalize
Use the integrated member lookup tool to review assignments. If you need to make changes, simply search for a member and click Reassign to manually place them.
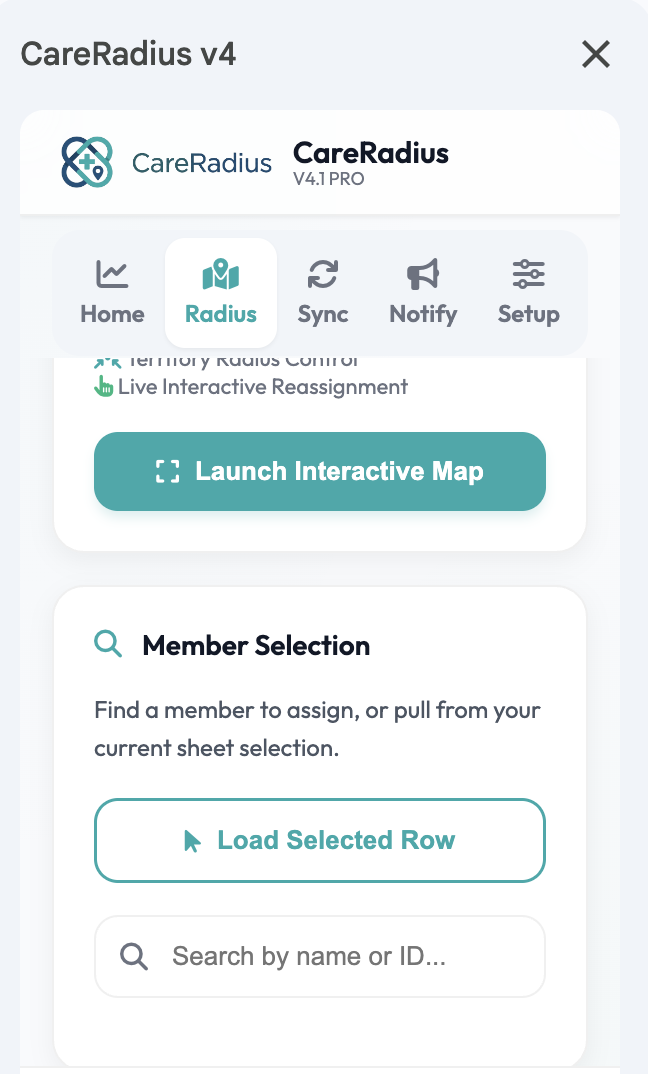
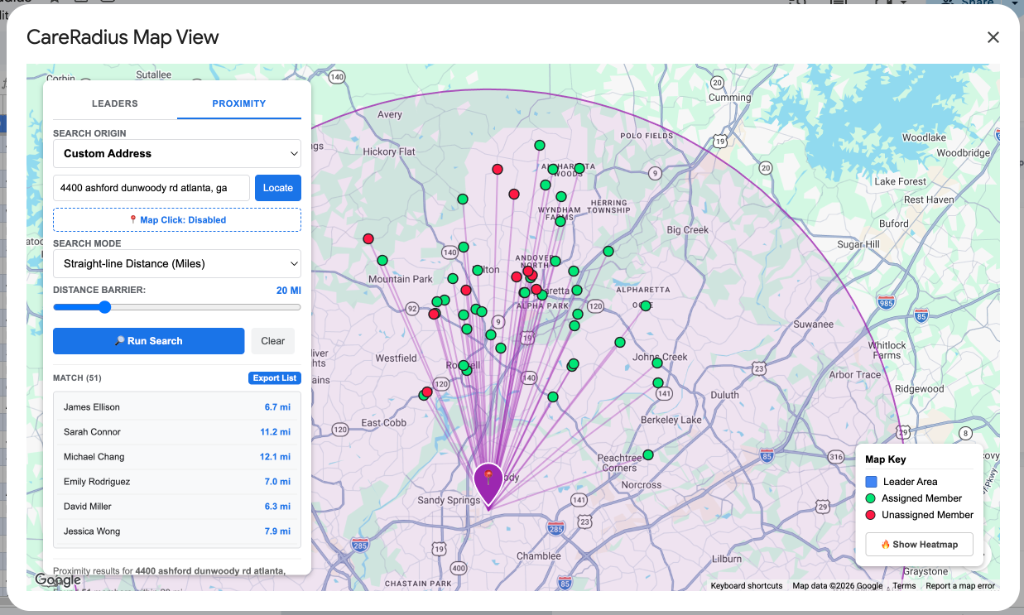
Run Proximity & Radius Search
Analyze and visualize your congregation's geographic proximity to any campus or custom address. Select a physical campus, geocode a custom street address, or toggle the Map Click tool to click directly on the interactive map. Select your mode (straight-line miles, driving miles, or driving duration in minutes) and select your distance barrier. Instantly see matched members highlighted on the map with connecting lines, and click Export List to automatically generate a Royal Blue, alternate-row stylized proximity sheet in your active spreadsheet.
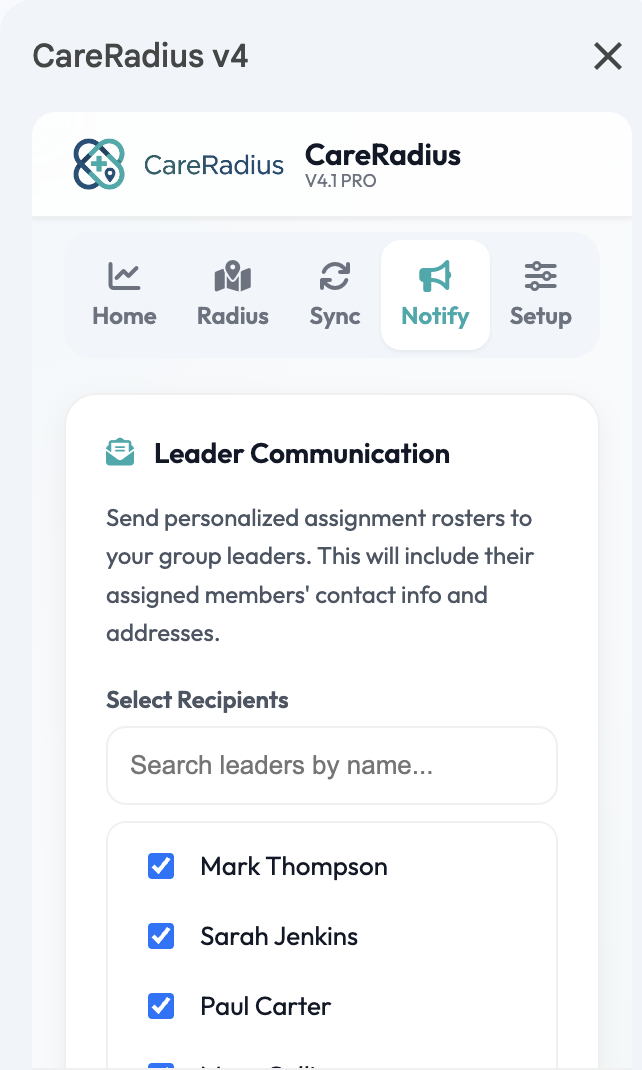
Communicate with Leaders
When you're ready, navigate to the Email tab. Select your leaders and instantly send out personalized rosters with all their newly assigned members!